A Long Exposure shot of the intriguing remains of a 1973 US Navy C-117d aircraft rests dramatically on the black volcanic sands of Sólheimasandur beach; this surreal discovery came after an arduous hike through relentless 60mph winds and pouring rain in Iceland, which occurred in the aftermath of Hurricane Ophelia. The scene captures a haunting beauty, merging nature's fury with the remnants of aviation history.
This image is available for the following products: Fine Art Photo Prints, Metal Prints, Canvas Prints, Framed Prints, Acrylic Wall Prints, Giclee Fine Art Prints

 Image 1 of 22
 Image 2 of 22
 Image 3 of 22
 Image 4 of 22
 Image 5 of 22
 Image 6 of 22
 Image 7 of 22
 Image 8 of 22
 Image 9 of 22
 Image 10 of 22
 Image 11 of 22
 Image 12 of 22
 Image 13 of 22
 Image 14 of 22
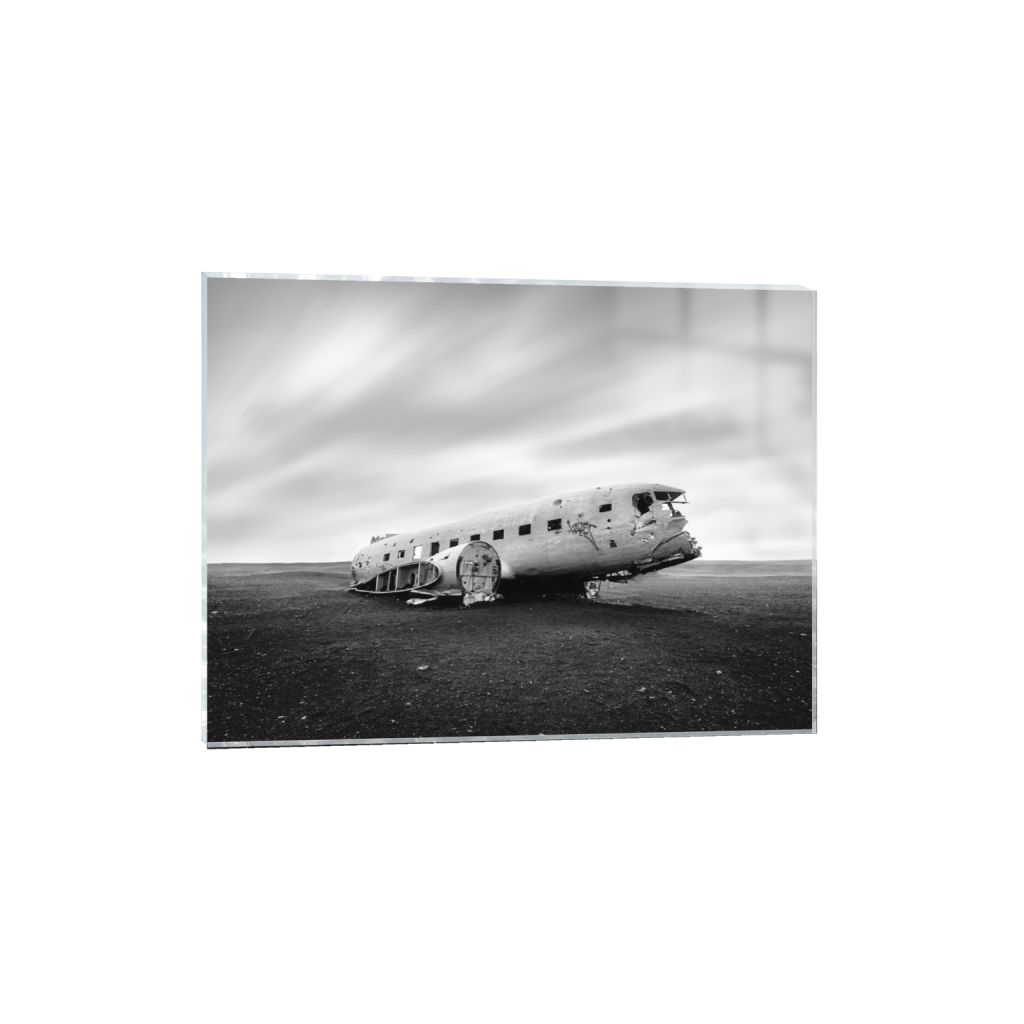 Image 15 of 22
 Image 16 of 22
 Image 17 of 22
 Image 18 of 22
 Image 19 of 22
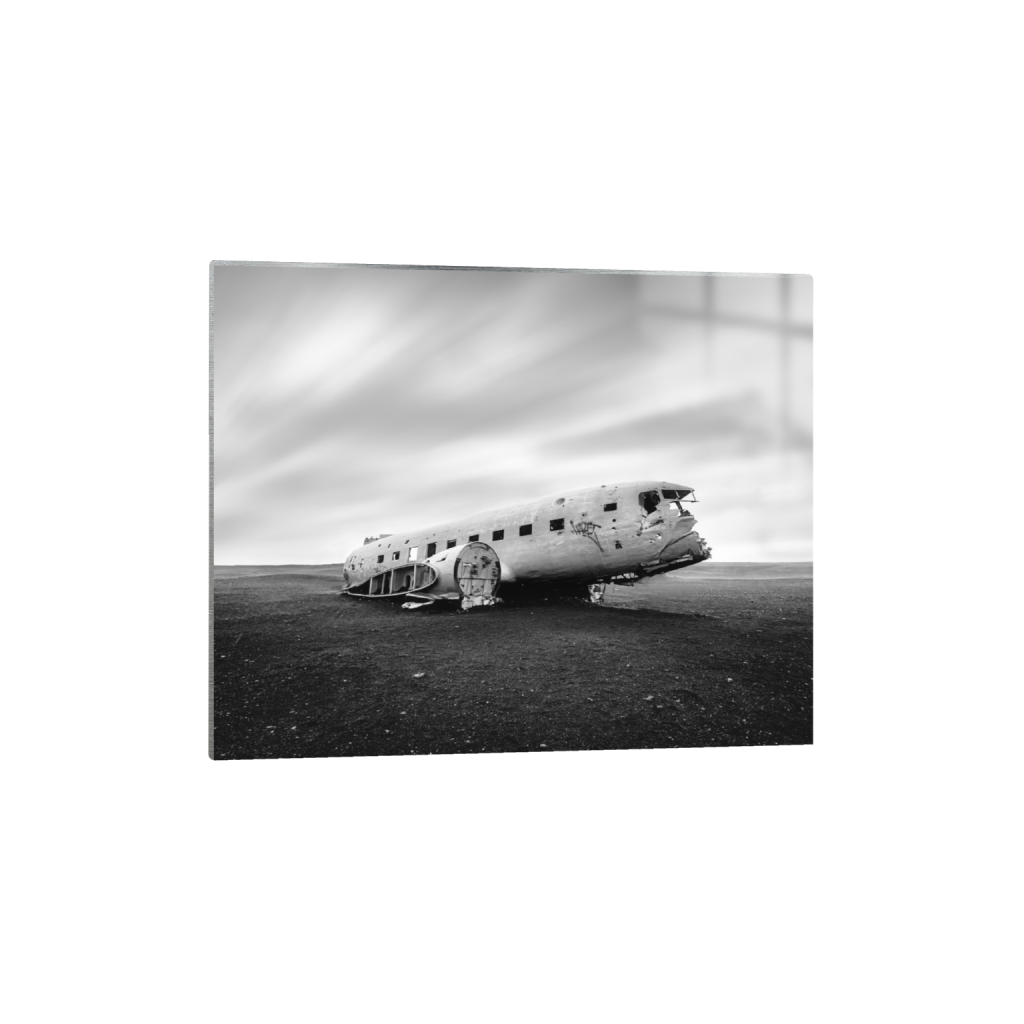 Image 20 of 22
 Image 21 of 22
 Image 22 of 22